This guide will focus on how to get subtitles on Kodi 20 Nexus and Kodi 19.5 Matrix. I have used the OpenSubtitles.org addon to set up and use subtitles for various videos. This tutorial also covers some primary FAWS and touches on correcting syncing issues and more. Let’s get started!
Why Get Subtitles on Kodi?
There can be many reasons to get subtitles on Kodi. One of the top reasons is the language barrier. If you’re streaming content in another language, subtitles can help you understand what’s being said. Furthermore, subtitles provide clarity in dialogue. It means if any video has a low-quality sound output, subtitles can aid in understanding the conversations and talks between characters.
Hearing impairments are another reason a user may be inclined to get subtitle support on Kodi. In short, whether you’re multitasking, want sound clarity, or have any other reason, subtitles can help elevate your streaming experience.
Kodi addons do not come with built-in subtitle support. Therefore, you need to integrate subtitles to Kodi separately.
Attention KODI Users: Read before you continue
Government and ISPs endlessly monitor your online activities using your IP address 35.175.39.36 (exposed to everyone). Kodi is an excellent platform for streaming movies, TV shows, and sports, but streaming copyrighted content can get you into legal trouble.
You should use a reliable Kodi VPN and protect your streaming activities and privacy. A VPN will hide your IP address and bypass government surveillance and geo-restrictions.
I trust and use ExpressVPN, the fastest and most secure Kodi VPN. It's easy to install on any Kodi device, including Amazon FireStick, PCs, and Smartphones. In addition, it offers a 30-day money-back guarantee, and 3 free months with the annual plan.
Read: How to Install & Use the best VPN for Kodi.
How to Get Subtitles on Kodi with OpenSubtitles.org
First, you must create an account to get subtitles on Kodi with OpenSubtitles.org. Unfortunately, you won’t be able to access the subtitles without completing the registration process. The following guide shows you how to:
- Create an account
- Download the OpenSubtitles.org Kodi Addon
- Configure and use the OpenSubtitles.org addon
Part 1: Create an Account on OpenSubtitles
The first part of getting the OpenSubtitles.org addon is creating an account on the site. Here’s how you do it.
1. Open the web page of OpenSubtitles.org and hit the Register button on the top.
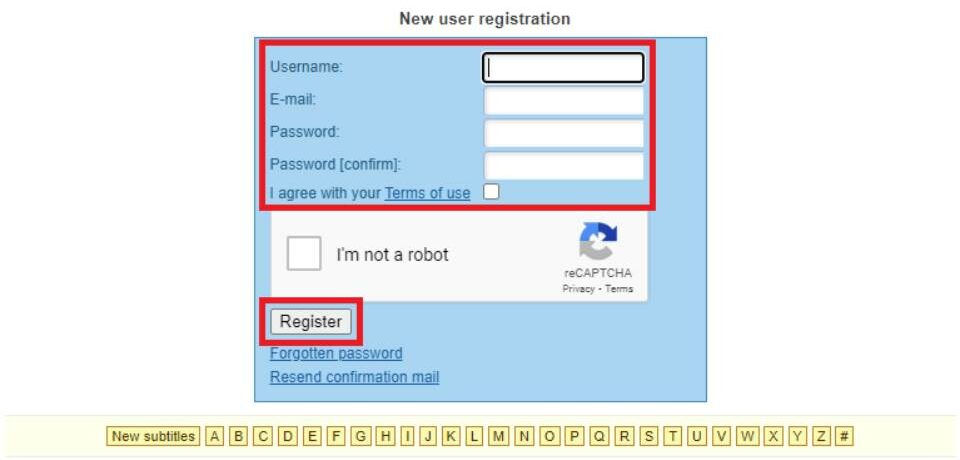
2. For new users, a registration section will appear. Fill in the Username, Email, and Password tabs. Then, tick the Terms of Use checkbox and press Register.
3. Once your account is created, you will receive a confirmation email. It’s essential to confirm your registration to activate your account.
Open your email inbox, open the front by OpenSubtitles.org, and click the confirmation URL to proceed. Once the confirmation goes through, your account will become active. You can then choose to log in to your OpenSubtitles account.
Part 2: Install OpenSubtitles Kodi Addon
Now that you’ve registered with OpenSubtitles, the next step is to install the OpenSubtitles Kodi addon. Here are the steps you must follow:
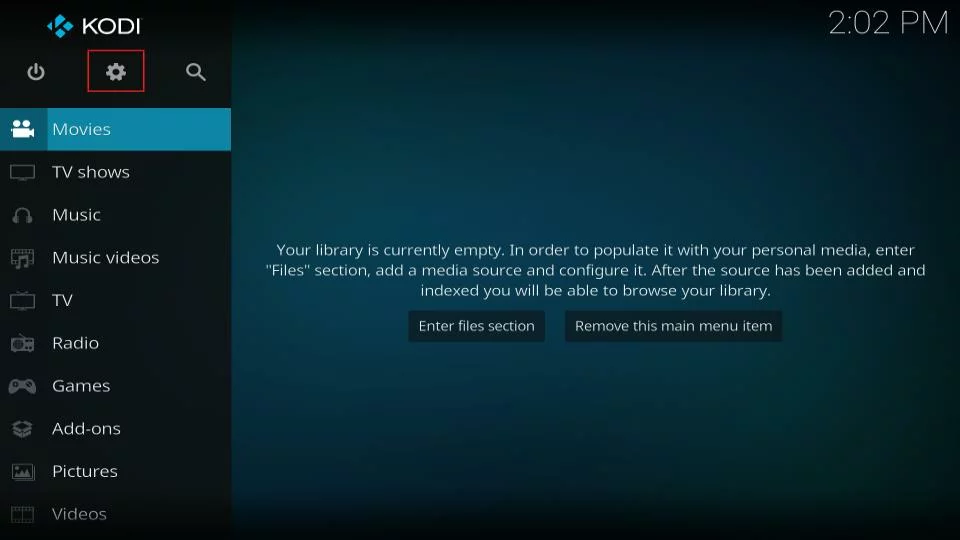
1. Initiate Kodi on your device and hit the Cog symbol in the top left corner.
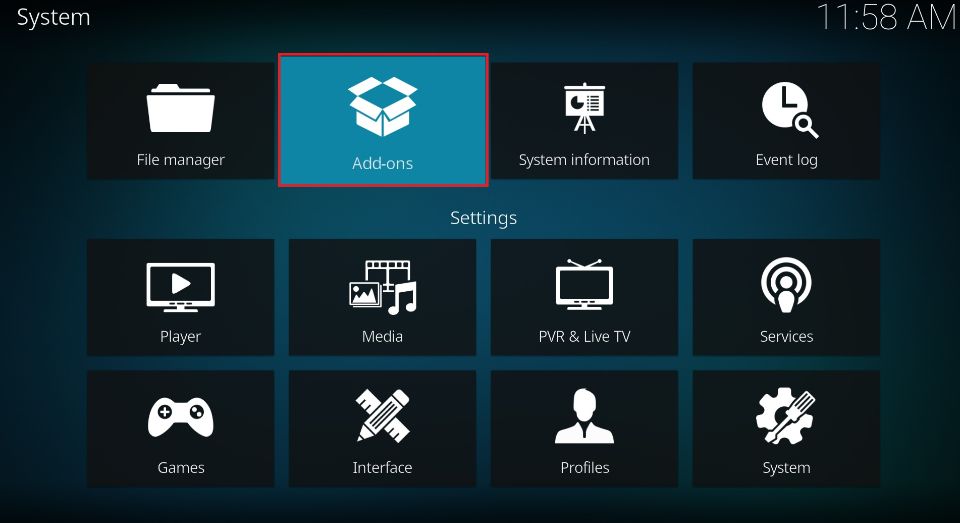
2. The Settings menu will load up. Move right and click the Addons icon.
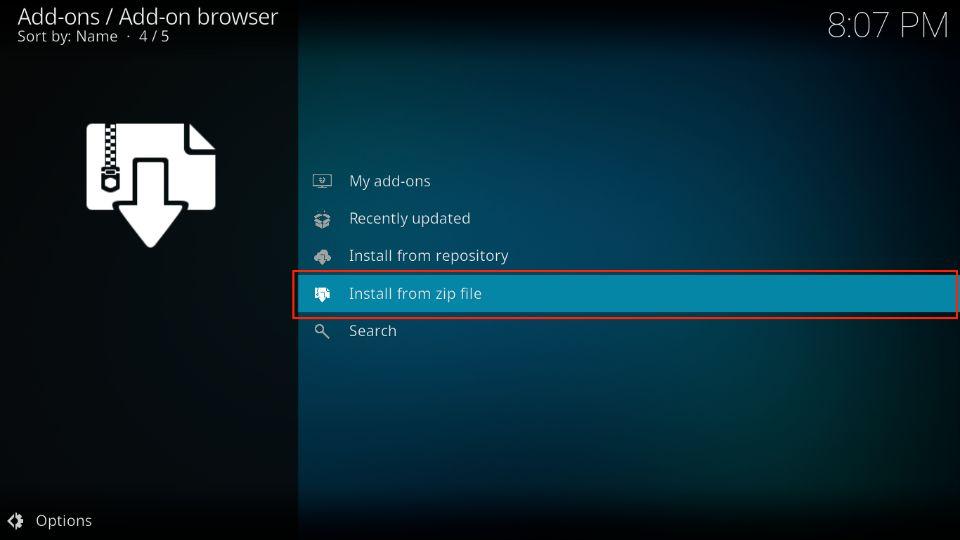
3. Now, swipe the list and press the Install from repository button.
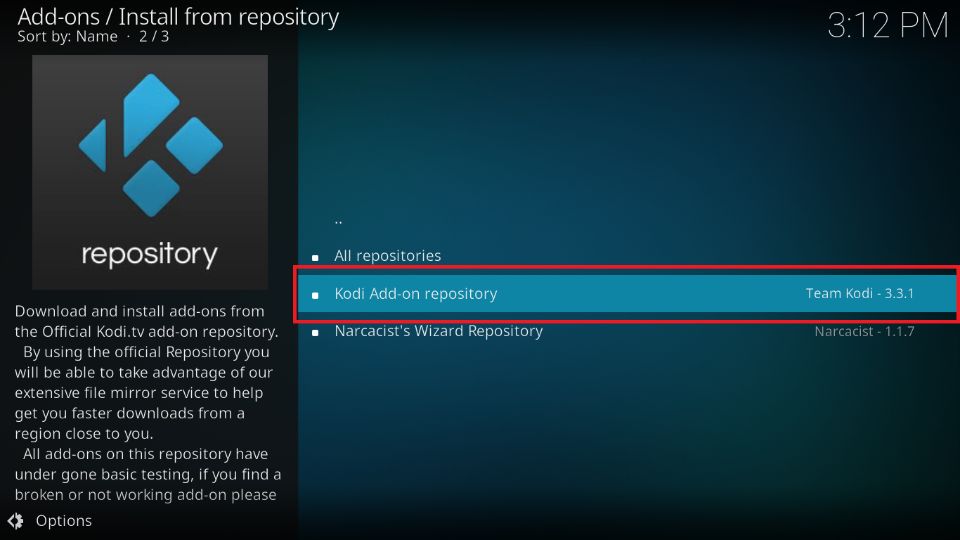
4. Select the Kodi Addon repository to proceed.
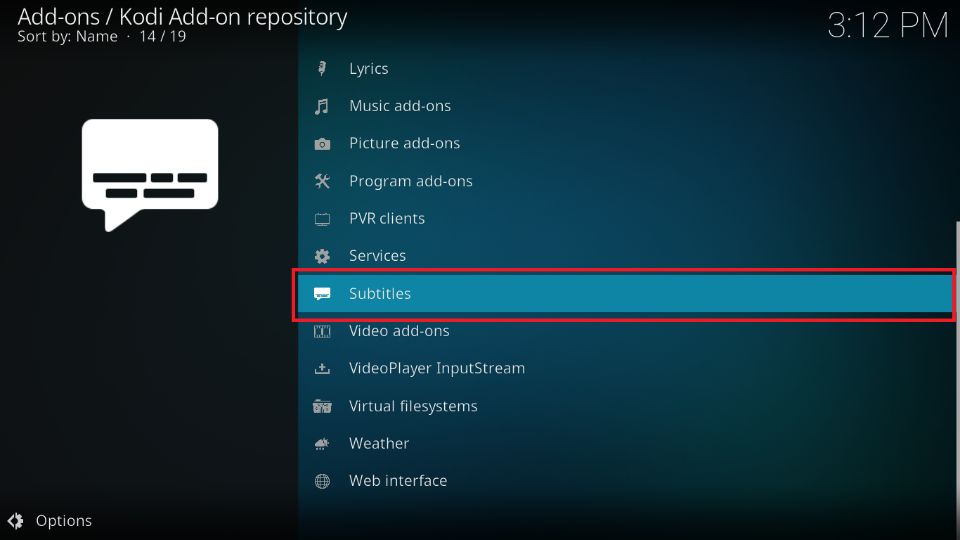
5. Navigate through the sections and click on Subtitles.
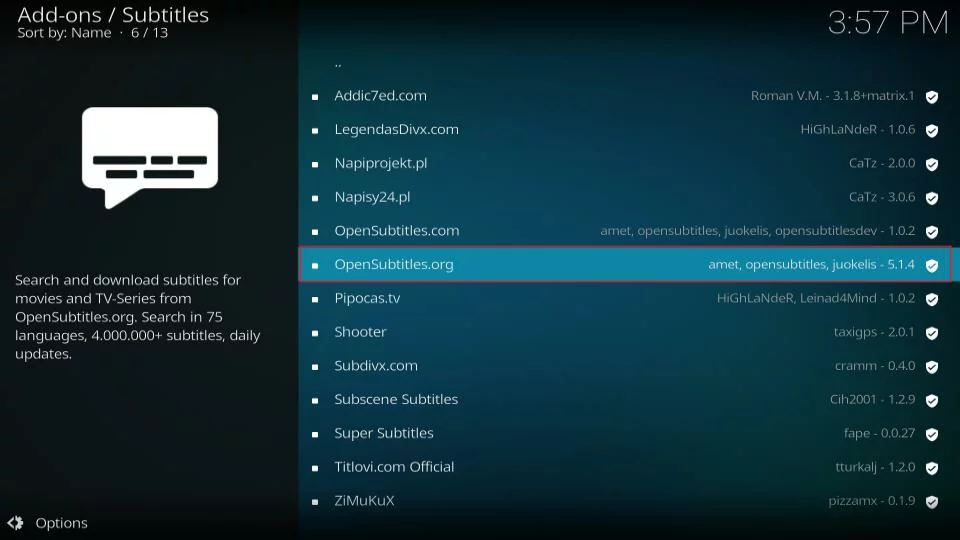
6. Now select OpenSubtitles.org from the list.
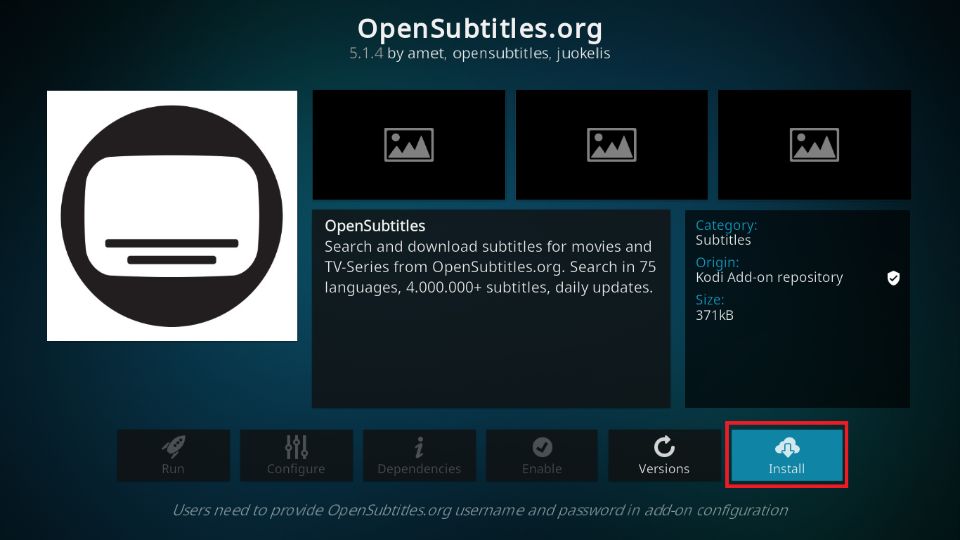
7. The OpenSubtitles.org dashboard will appear. Scroll down and hit the Install button to begin the process.
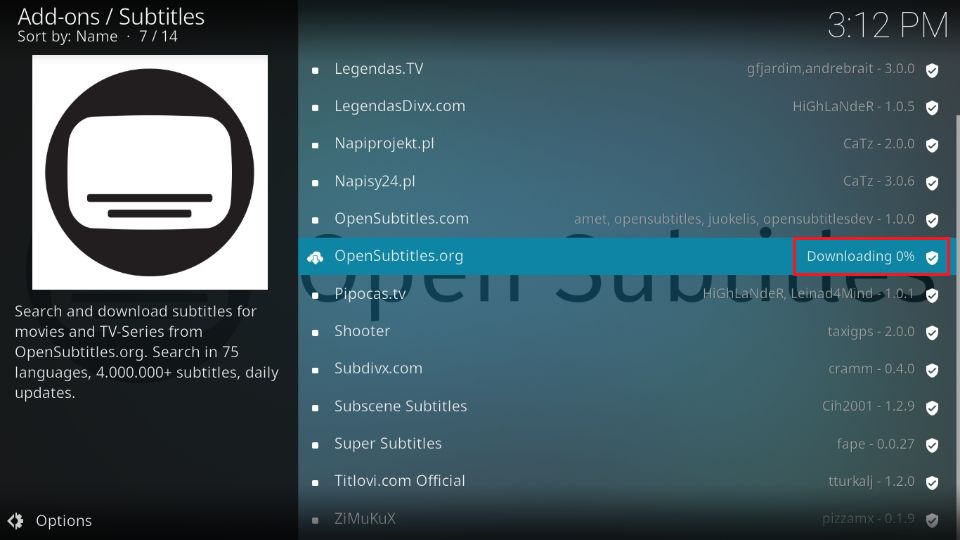
8. You can now see a Downloading sign next to OpenSubtitles.org. Let the process complete.
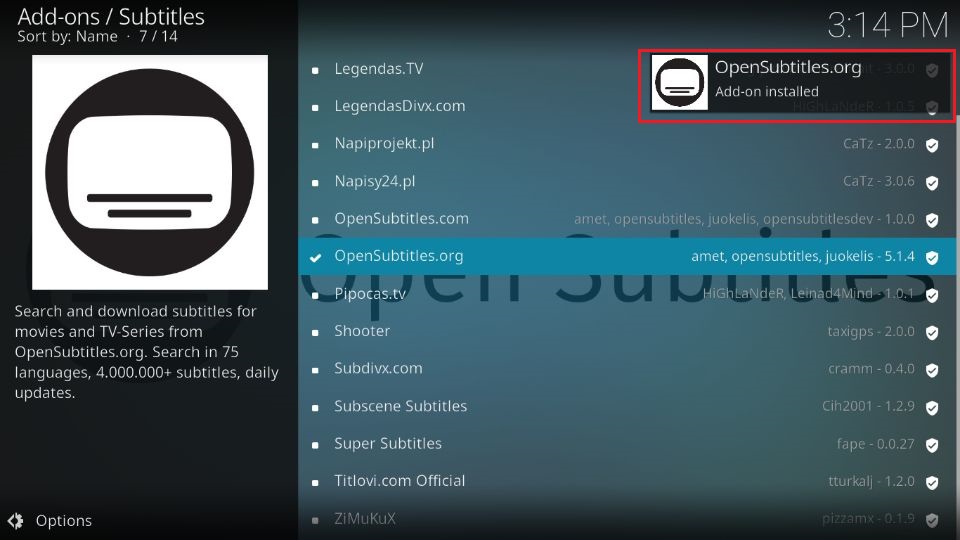
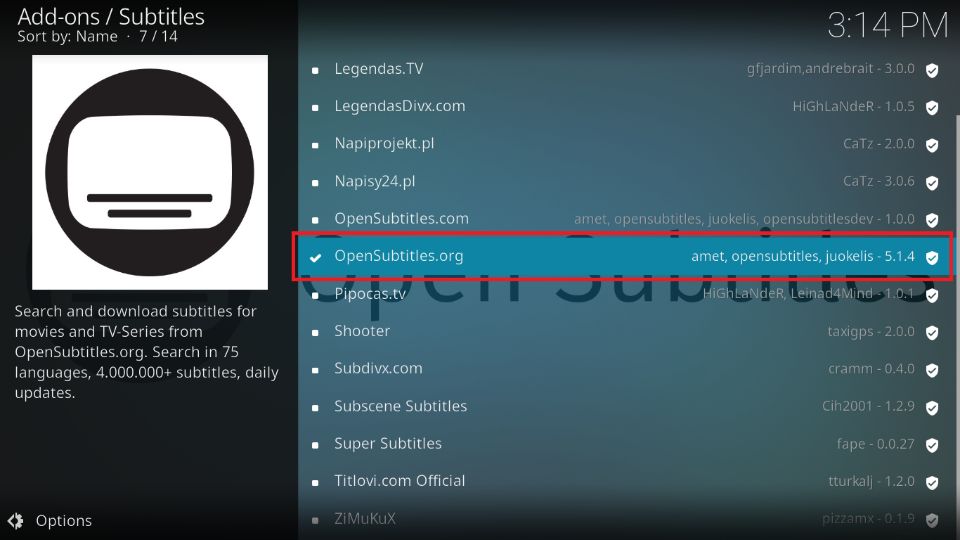
9. Soon, you’ll receive the ‘OpenSubtitles.org Addon installed‘ notification.
Congratulations! You’ve successfully gotten the OpenSubtitles addon on Kodi.
Part 3: Configure OpenSubittles Kodi Addon & Setting Up Subtitle Preference
Before you start streaming your favorite shows, the last step is to configure OpenSubtitles. You must also set up the subtitle preference on Kodi. Here’s how you do it:
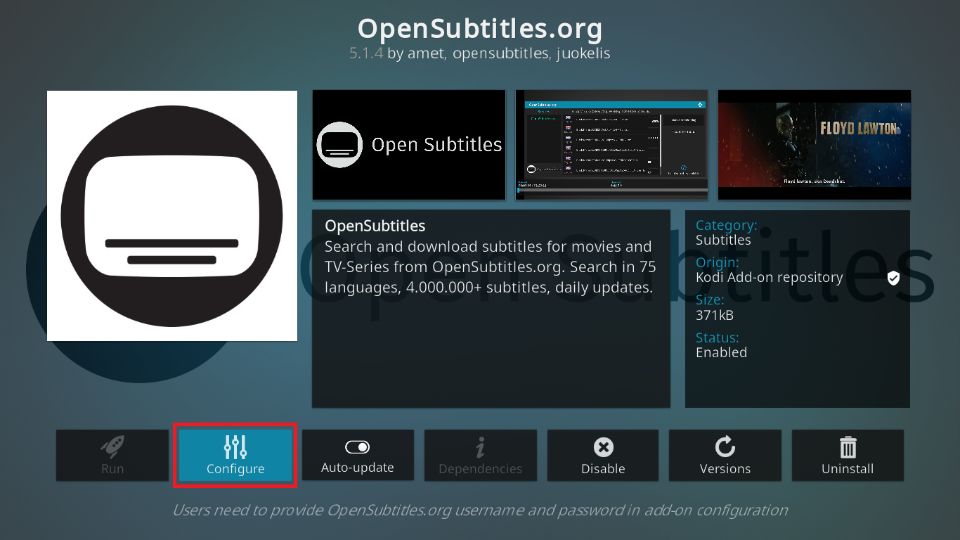
1. In the Addons section, click OpenSubtitles.org to launch the addon dashboard.
2. When the addons dashboard appears, navigate to and press the Configure button.
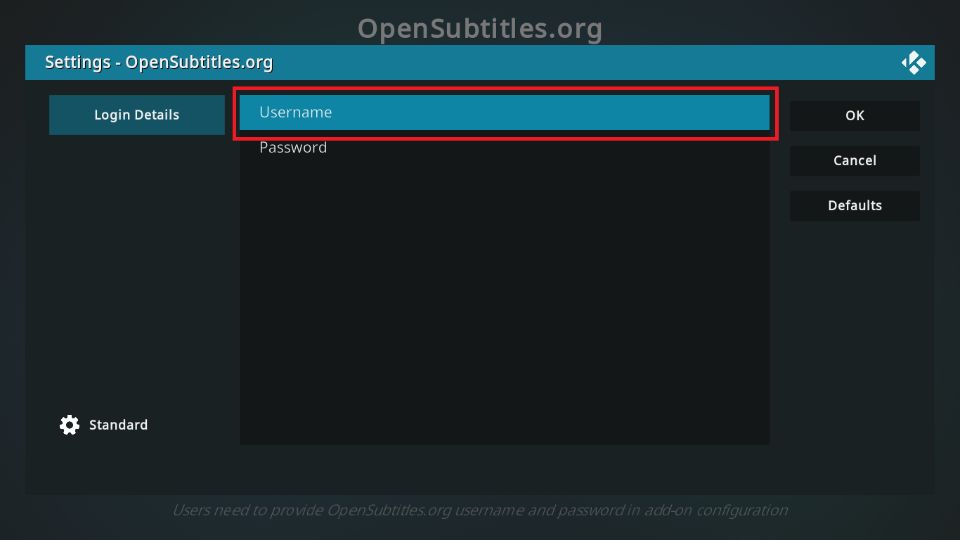
3. The Settings menu of OpenSubtitles.org will pop up. Complete the login process to configure the settings. To do that, first, click the Username tab.
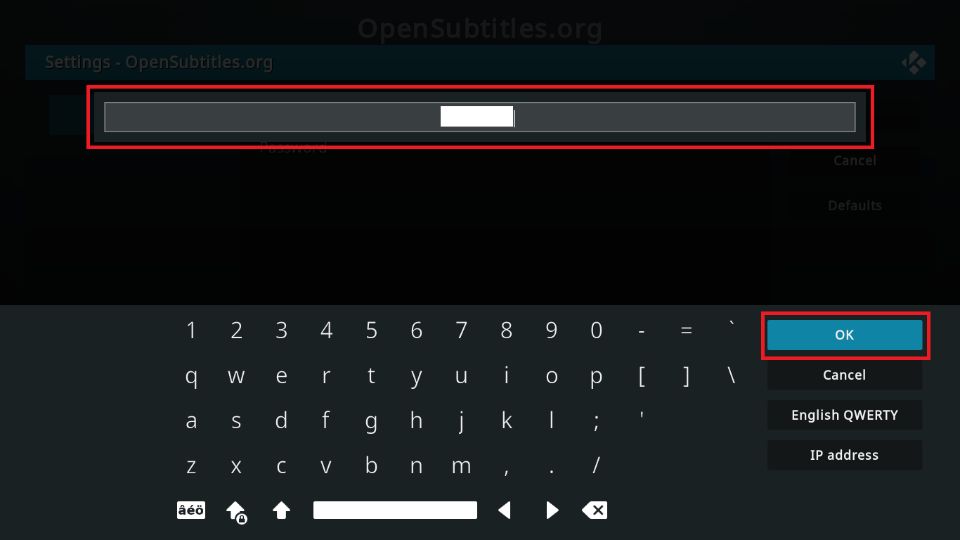
4. Enter your Username associated with OpenSubtitles and select OK.
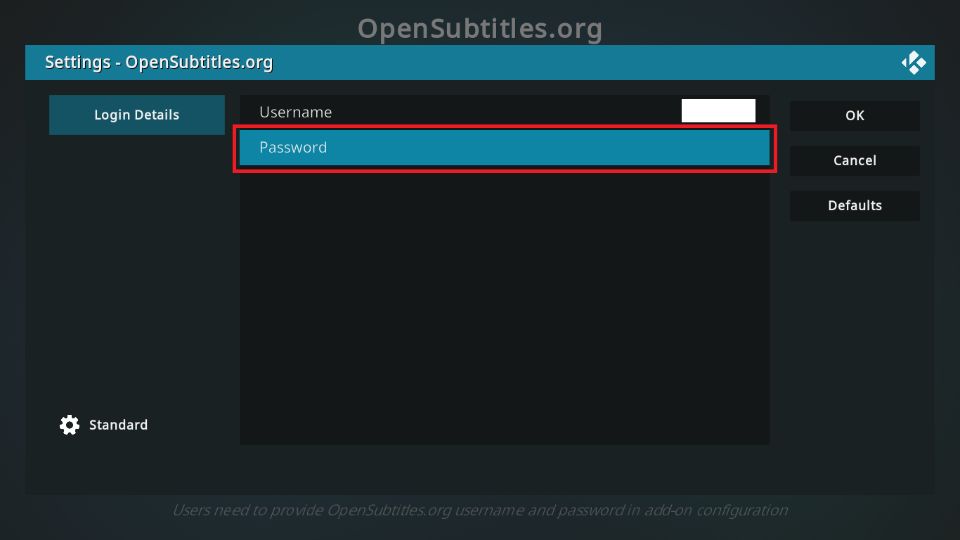
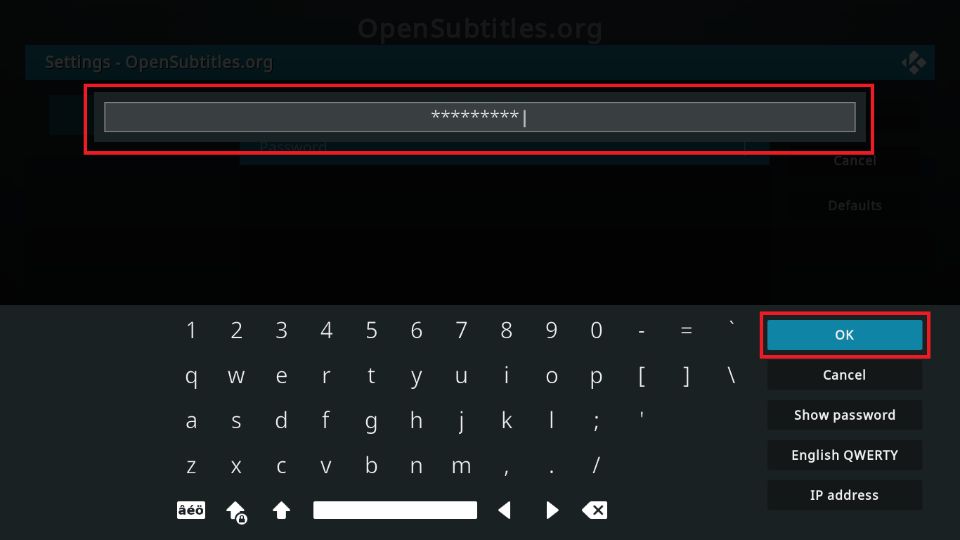
5. Next, select the Password tab.
6. Put in your Password and choose OK.
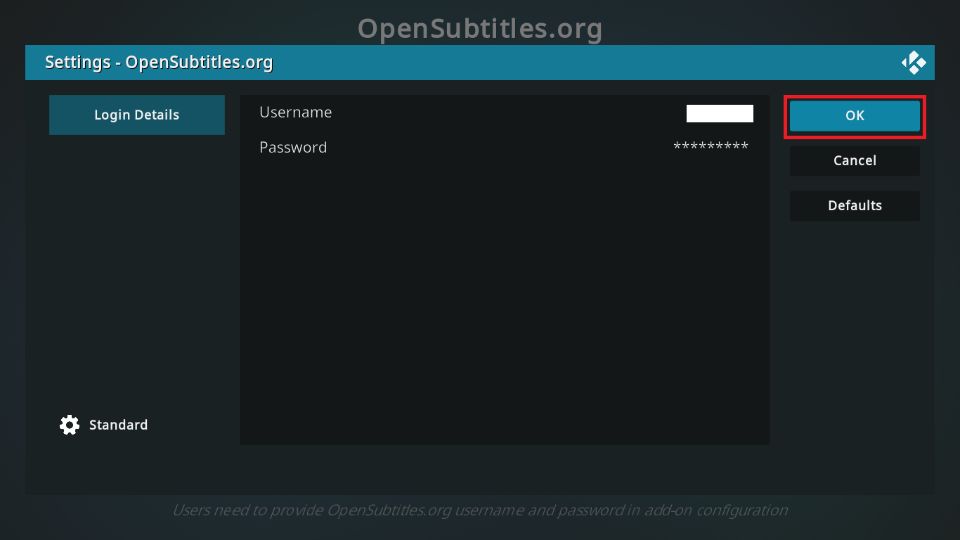
7. Recheck the entered details once and hit OK to proceed.
8. Return to the System/Settings menu and press the Player icon.
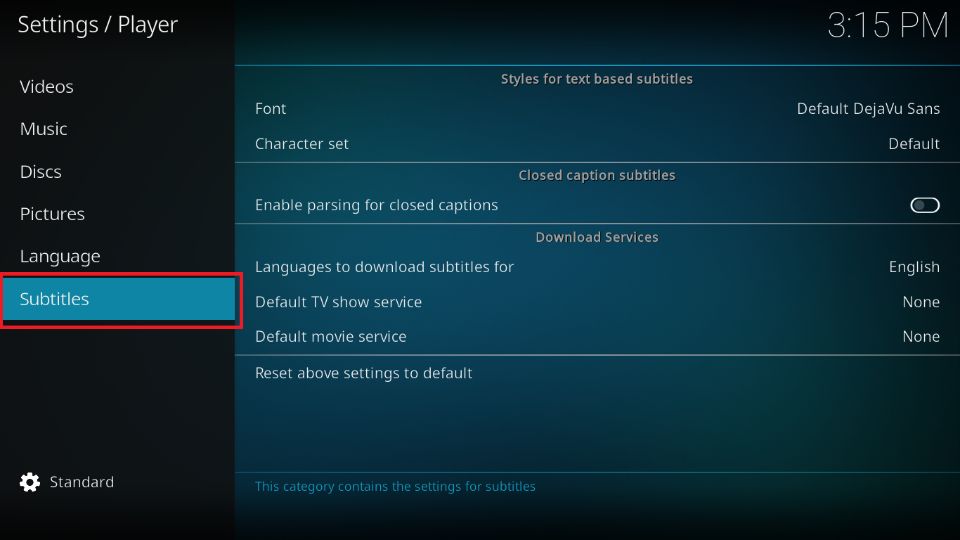
9. Scroll down the menu on the left and choose Subtitles.
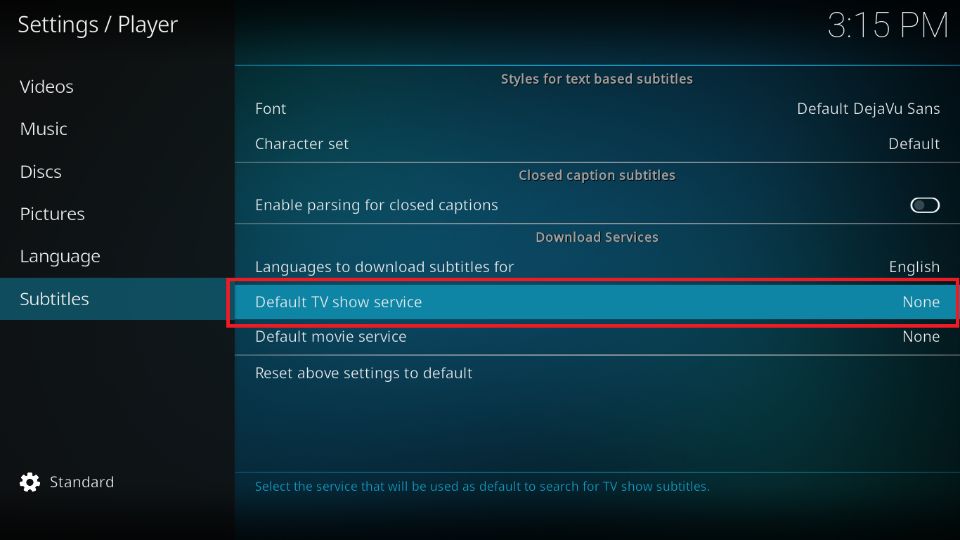
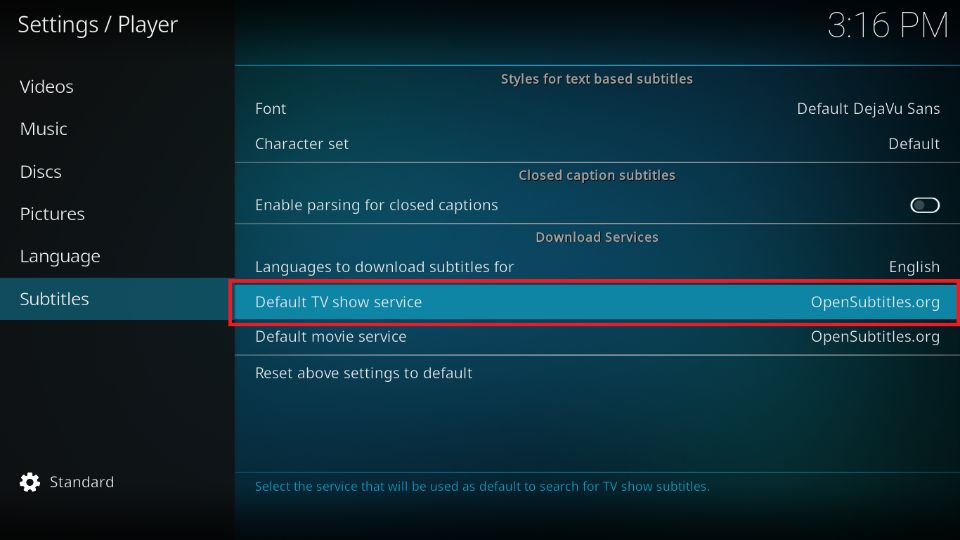
10. Then click the Default TV show service tab.
11. Change the Subtitles Settings from None to OpenSubtitles.org.
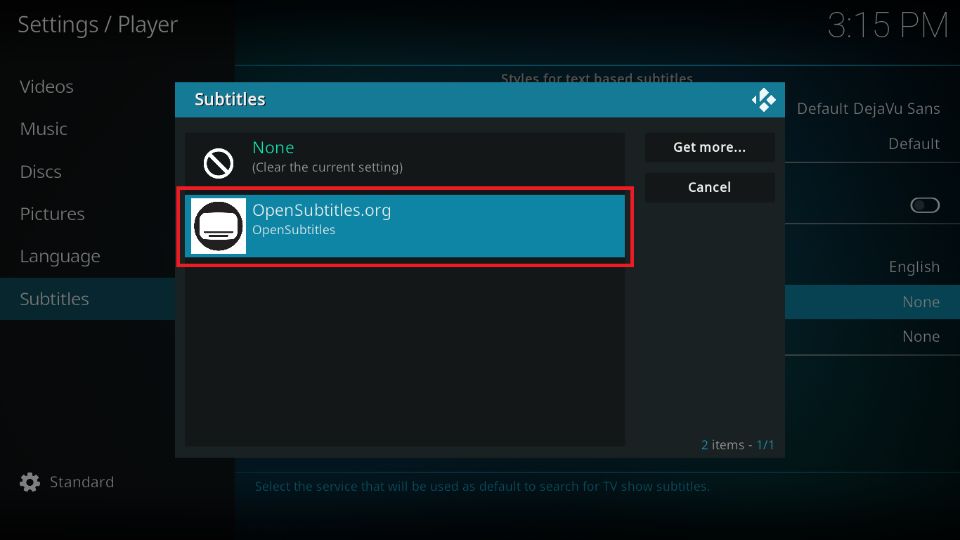
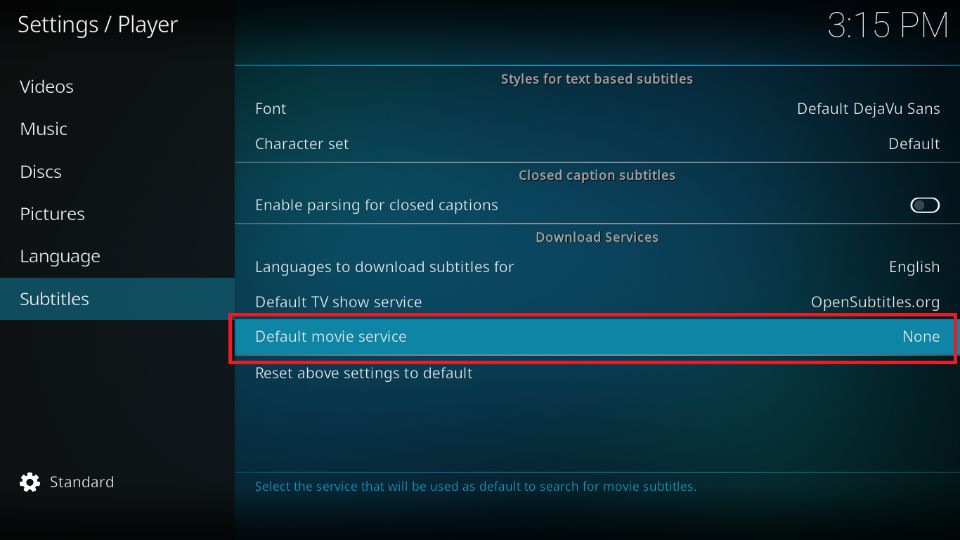
12. Select the Default movie service tab.
13. Again, select OpenSubtitles.org in the Subtitles menu.
Congratulations! You have now enabled Subtitles on Kodi.
Wait! It looks like you are all set to start watching your favorite content on Kodi. But have you protected your online identity yet? You are under constant surveillance by the Government and ISP. They use your IP address 35.175.39.36 to track you. Streaming free or copyrighted videos may get you into legal trouble.
Thankfully, you can use a VPN to easily protect your privacy and go invisible from your Government and ISP. I use and recommend ExpressVPN with Kodi.
ExpressVPN is the fastest, most secure, and streaming-friendly VPN. It is easy to install and set up on any Kodi device, including FireStick, Smartphones, PCs, and more.
ExpressVPN, offers an unconditional 30-day money-back guarantee. So, if you do not like the service (I don't see why), you can get a full refund within 30 days.
Please remember that we encourage you to use a VPN to maintain your privacy. However, we do not condone breaking copyright laws.
Before you start using Kodi for streaming, here is how you can protect yourself with ExpressVPN:
Step 1: Sign up for ExpressVPN Here
Step 2: Download ExpressVPN on your device by clicking HERE
Step 3: Open the ExpressVPN app on your device. Sign in with your account. Click the connect/power button to connect to the VPN
Great! You have successfully secured yourself with the best Kodi VPN.
How to Get Subtitles Without Registration on Kodi with Subscene.com
Although OpenSubtitles is an excellent subtitle service, it’s not the only one. I personally love the versatility and wide variety of subtitles available on OpenSubtitles. But the registration and setup may require a little effort.
So, if you prefer a quick and easy setup process, Subscene.com has you covered. It is another subtitle service that works great on Kodi.
Although Subscene doesn’t have as many subtitles available as OpenSubtitles, it will get the job done. The best part? Follow these instructions:
1. Navigate to the main page of Kodi. Then, select the Cog logo on the top.
2. In the Settings section, scroll and select the Player icon.
3. Select the Default TV show service button in the Subtitles section.
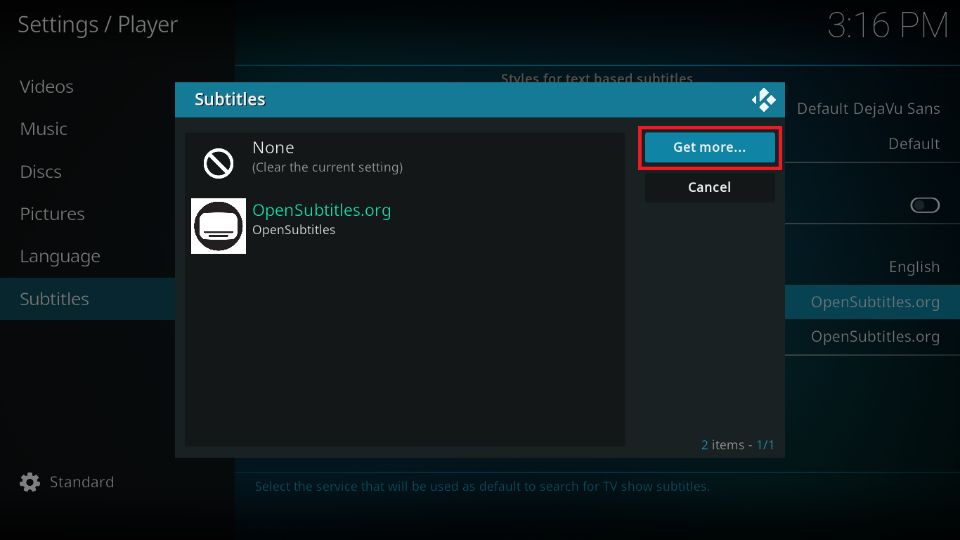
4. Select Get more.
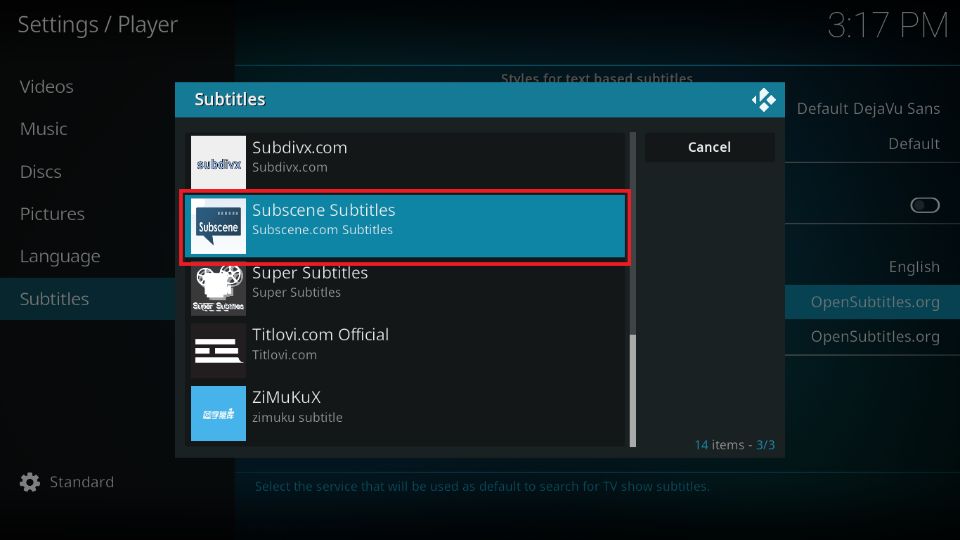
5. From the list, select Subscene Subtitles.
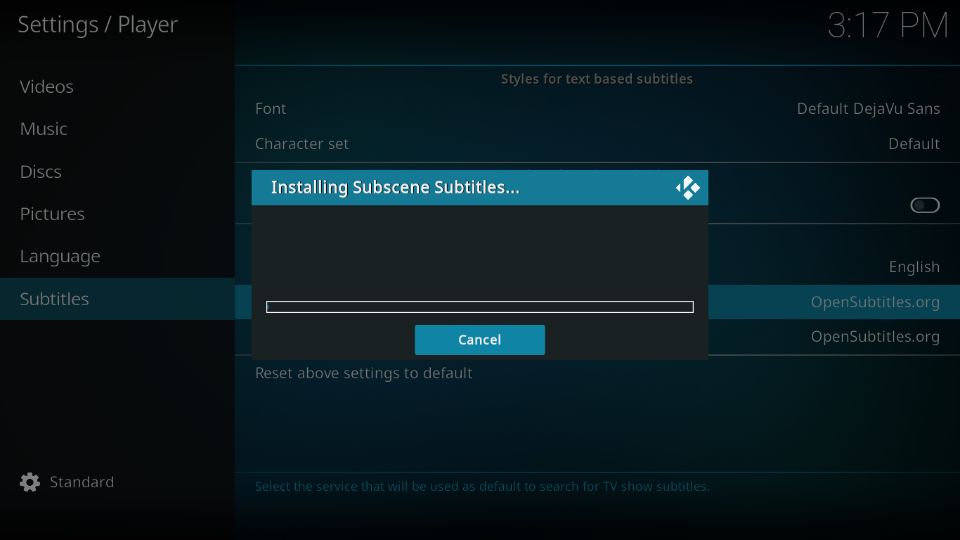
6. The installation of Subscene Subtitles will begin. Please wait for the process to complete.
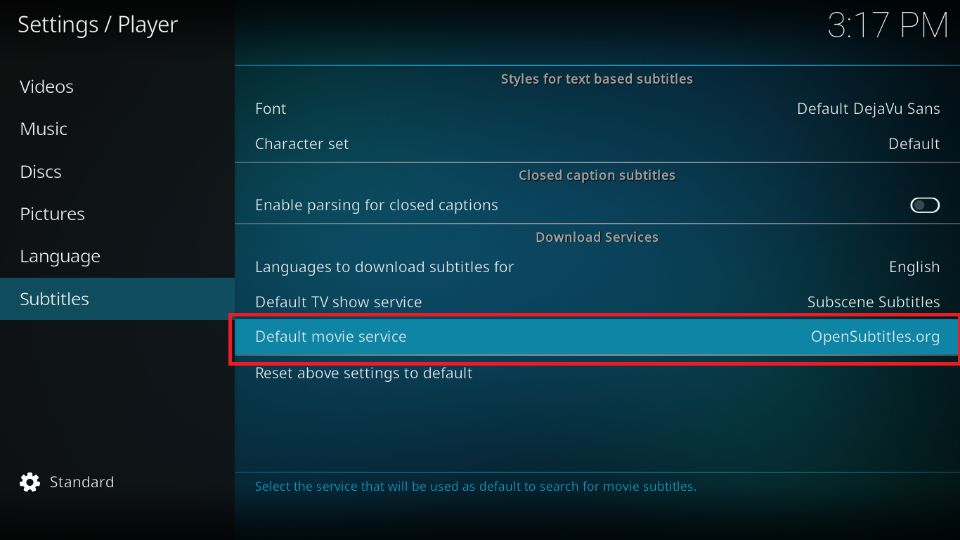
7. After the installation, Subscene Subtitles will appear beside the Default TV Show tab. Now, select the Default movie service tab.
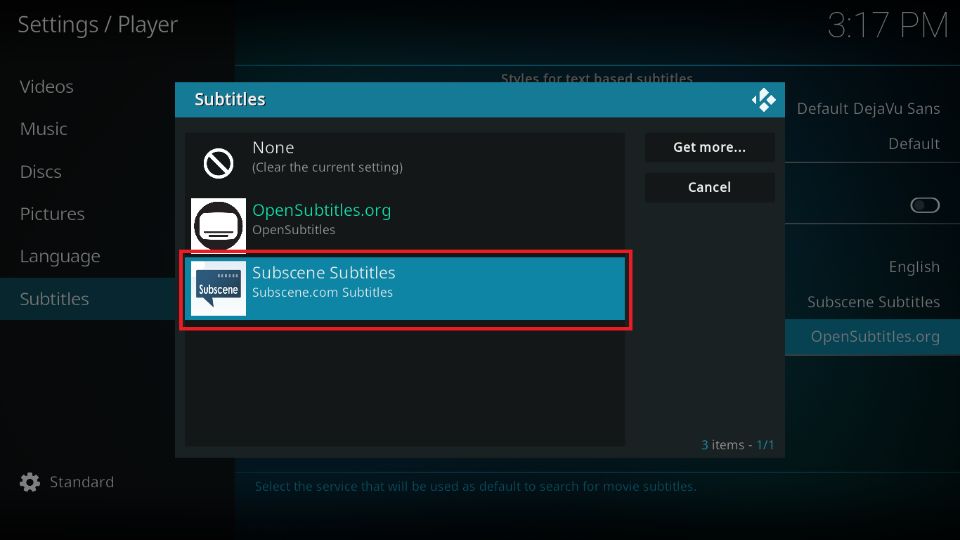
8. Select Subscene Subtitles to make it the default option.
That’s about it. You have now enabled subtitles by Subscene for movies and TV shows.
How to Enable & Use Subtitles on Kodi
The OpenSubtitles addon has various subtitles for movies and episodes. It gives you the option to download your preferred subtitle file. But first, you need to enable subtitles on Kodi. Follow these steps to enable the subtitle settings and use them on Kodi:
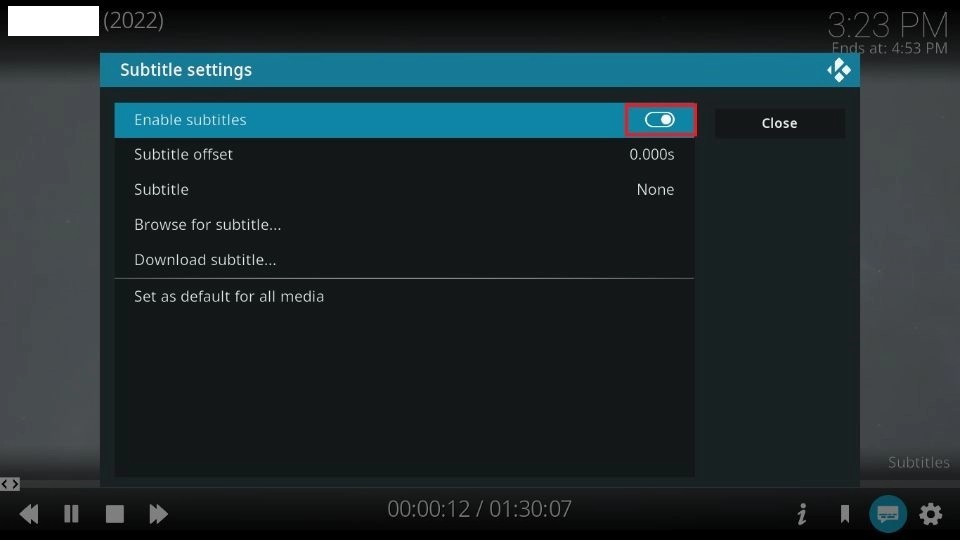
1. Play any video on Kodi and tap the Subtitles logo on the bottom right side of the display.
2. First, ensure that the Enable Subtitles switch is toggled on.
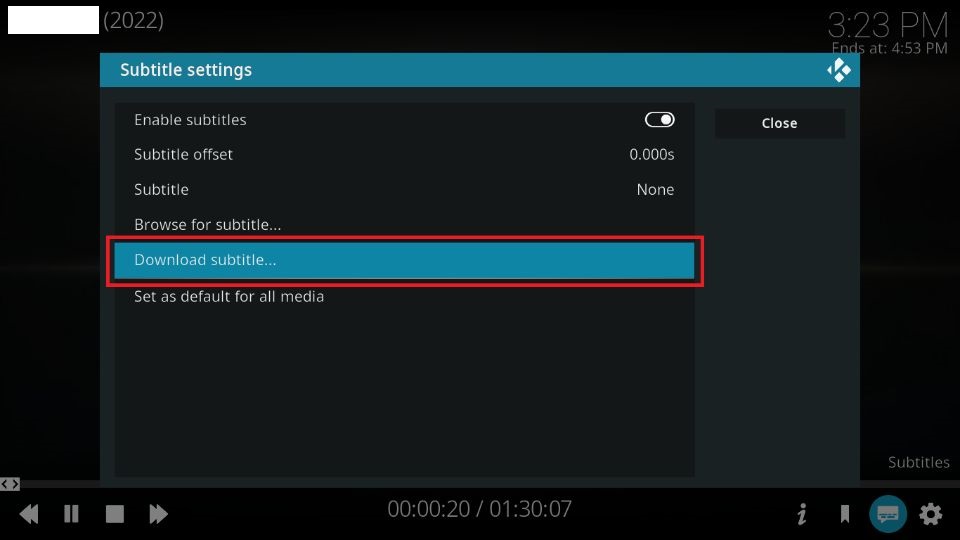
3. Then, scroll down and select Download subtitle.
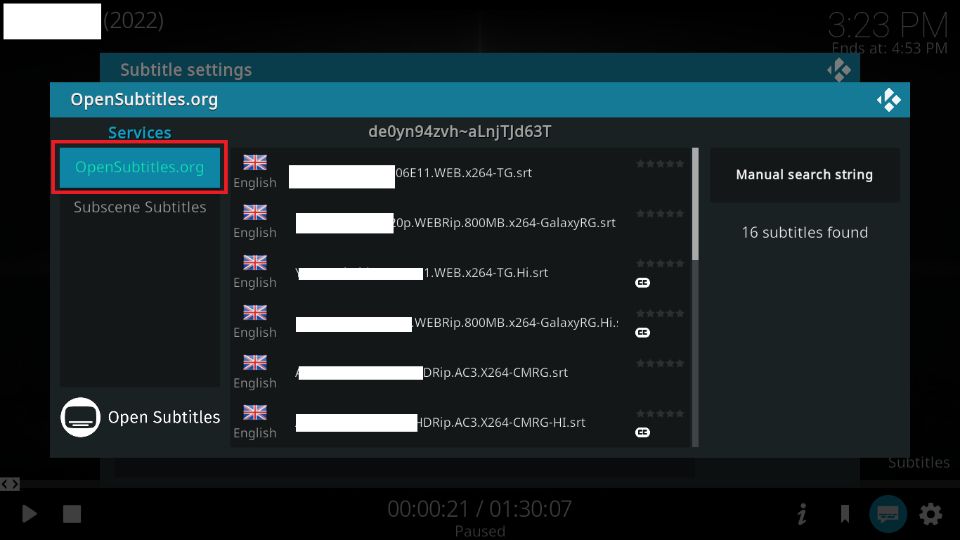
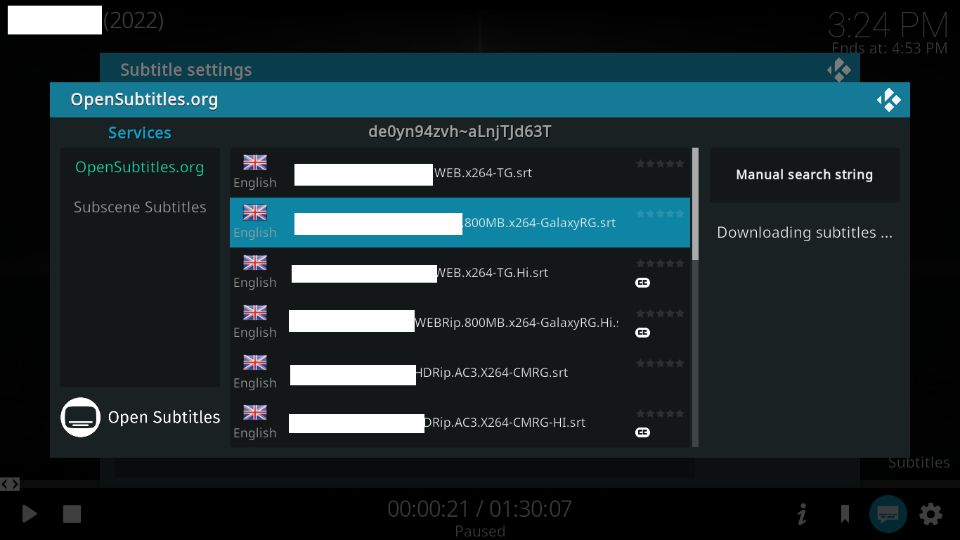
4. Select OpenSubtitles.org or any other service.
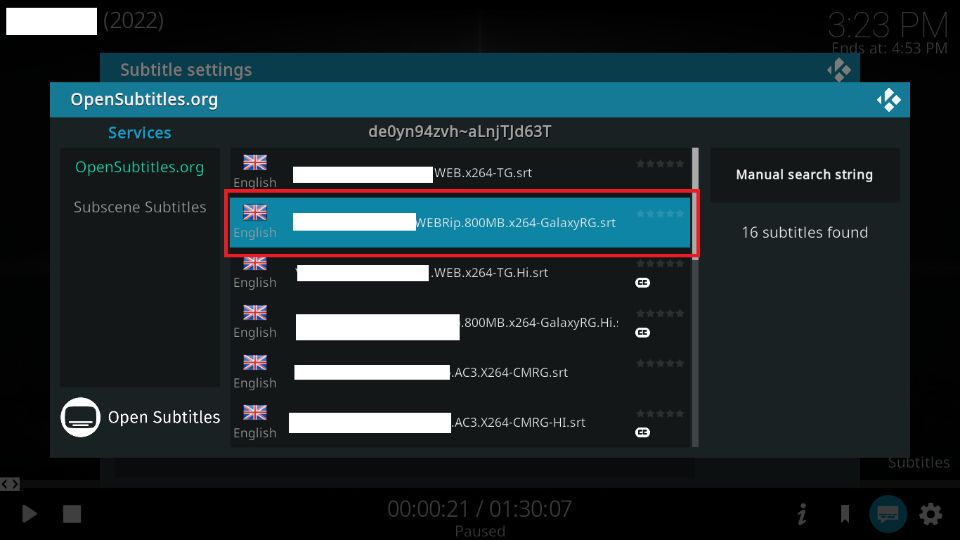
5. You can now view all the available subtitles for the show or movie. Select a Subtitle file from the list of available options.
6. The selected subtitles will start to download. You can play the particular when the download completes deo and enjoy subtitles support.
Fixing Out of Sync Subtitles
If the downloaded subtitles are out of sync, there are two ways to fix it. You can either download new subtitles and try them. Or, you can use the subtitle offset feature to sync them. Here’s how:
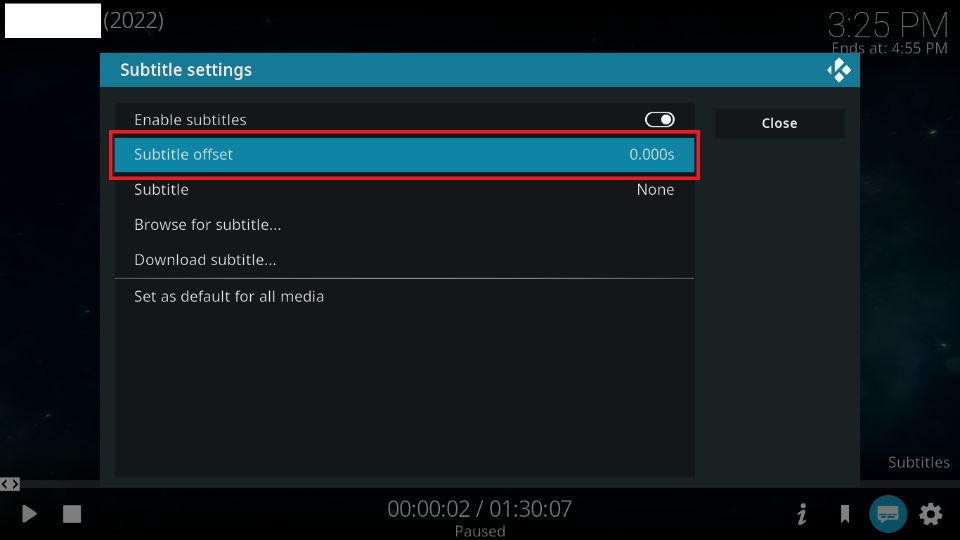
1. Again, play a show you want to get subtitles for. Then, press the Subtitles button on the bottom right side.
2. Now, click Subtitle offset.
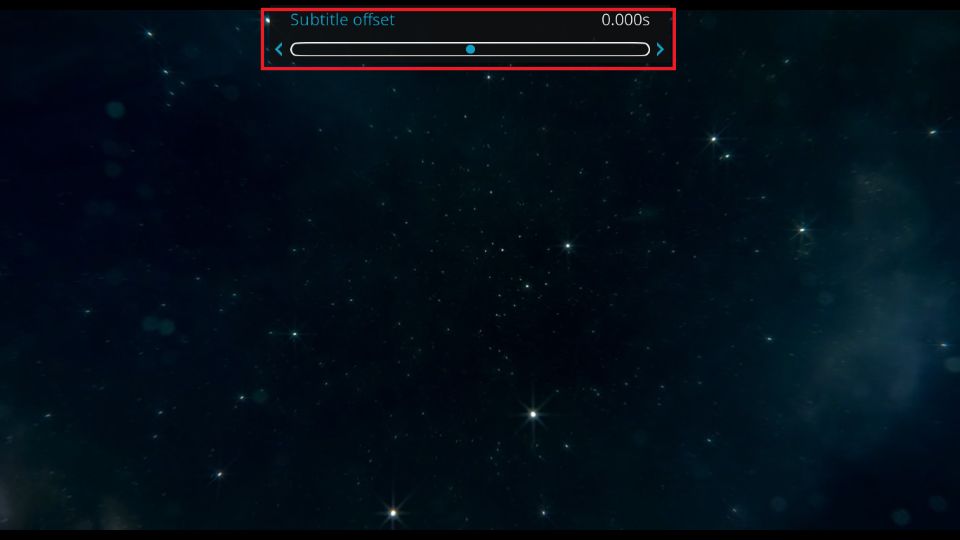
3. Use the Subtitle offset bar to sync the subtitles with the video content.
FAQ’s
Here are some subtitles on the Kodi FAQs.
Why can’t I find subtitles for my favorite TV show or movie?
If you can’t find the subtitles for your favorite TV shows on any subtitles addon, they are unavailable on the platform. So many movies and TV shows are available that an addon can’t have subtitles for each one.
To fix the issue, you can use a different subtitle service and see if they have the required subtitles. Popular subtitle addons include OpenSubtitles, Shooter, Subscene Subtitles, and more.
I can’t see subtitles in some Kodi addons; what should I do?
The easiest way to fix the subtitles issue in any Kodi addon is to reinstall the file. If that doesn’t work, you can also use an alternate subtitles addon to get the subtitles for the movie.
What are some other official subtitle addons I can add to Kodi?
There are plenty of amazing subtitles addons for Kodi. Although OpenSubtitles is a great option, you can choose any other too. Some of the options include:
- ZiMuKuX
- Super Subtitles
- Addic7ed.com
- Legendas.TV
- BSPlayer Subtitle
- Divxplanet
- Shooter etc
Final Words
This guide highlights everything about how to get subtitles on Kodi. OpenSubtitles.org is undoubtedly one of the top Kodi addons due to its wide range of available subtitles for most shows and movies. However, if you’re not a fan of the lengthy registration and setup process, you can use Subscene Subtitles to get the subtitles. Not only that, there are a bunch of other Kodi addons dedicated to subtitles that you can get via different repositories.
Related:





Leave a Reply